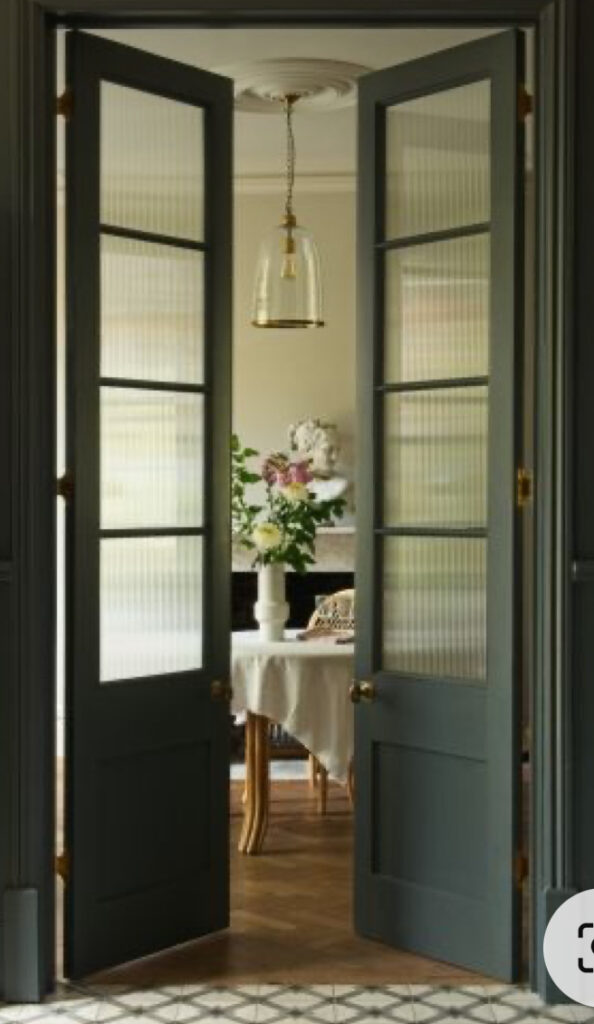
When you move into a home that was built in 1977 and updated in 1992, there will inevitably be outdated design elements. I realize to many this poses no real concern, but to me this is my opportunity to shine in terms of DIY projects!
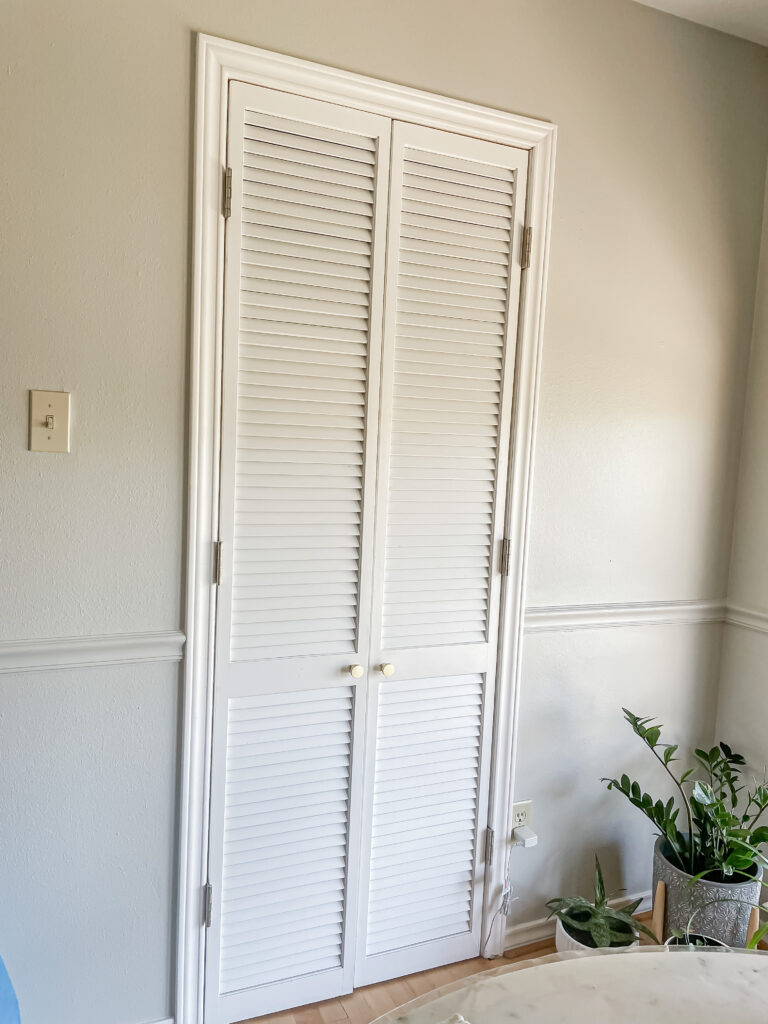
We updated our guest room bifold closet doors not long after we moved in, then we did the same with the office closet doors. Basic shutter or louvered closet doors are often used when updating or building a home because they are inexpensive. I often have to remind myself that not everyone thinks how a closet door looks is important! But, I want every little detail of our home to look fabulous.
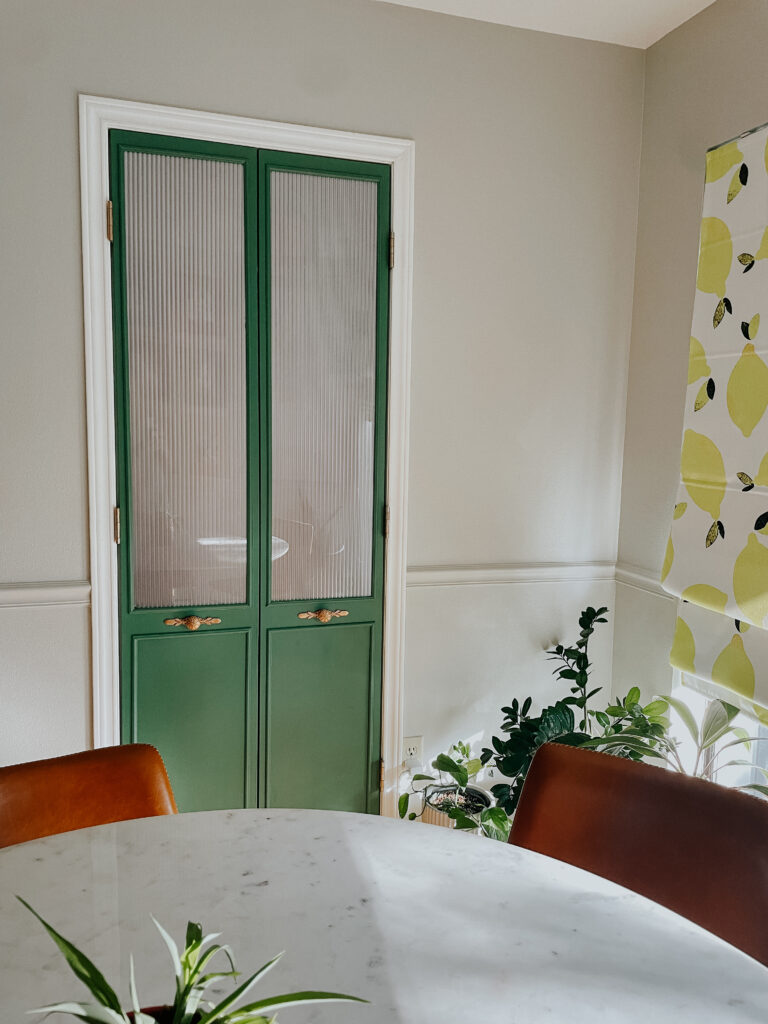
The pantry doors were the same shuttered doors as the guest room & office so I have been itching to give them a glow up for months — years really— but have failed to start.
As with any DIY project I start, Pinterest is usually my R & D department. Yes, Pinterest is the number 2 search engine next to Google! I bet you didn’t know that! I have always wanted frosted glass of some kind in them but wasn’t sure exactly what I wanted that to look like. Finding inspiration and ideas from Pinterest is an excellent way to start. I began by just simply searching “double pantry doors”. I began seeing so many reeded (or fluted) glass pantry doors and fell in love. Once I saw all the pantry doors of my dreams popping up I narrowed my search to “reeded glass pantry doors”, “vintage pantry doors” or “modern pantry doors”. You get the idea. And so my idea was born.
*This post contains affiliate links. That means, while it’s the same price for you, I get a very small commission out of it that helps me and my family. But most importantly, helps fund my estate sale and coffee addiction.

Supplies needed
• Trim – 17/32 in. x 7/32 in. is the size I used
• Paint (I used Park Bench 16.9 fl oz/500 mL and still have 1/2 jar left)
• Knobs
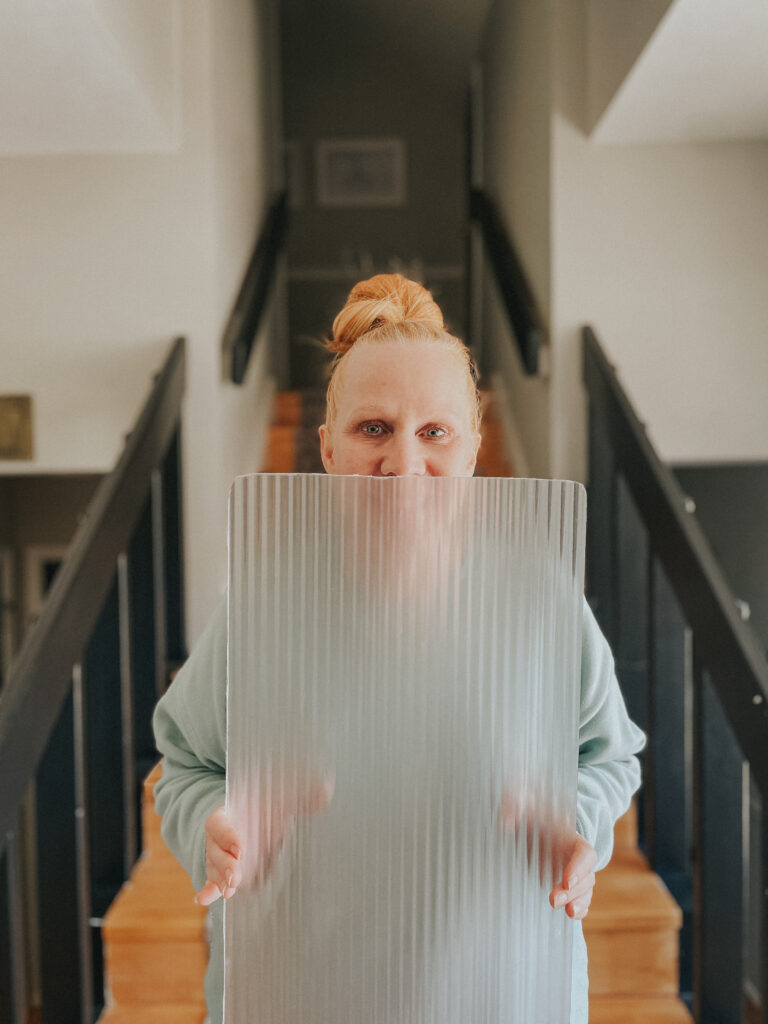
• Plexi glass – I used the 48″ long
• Router (optional)
Tutorial
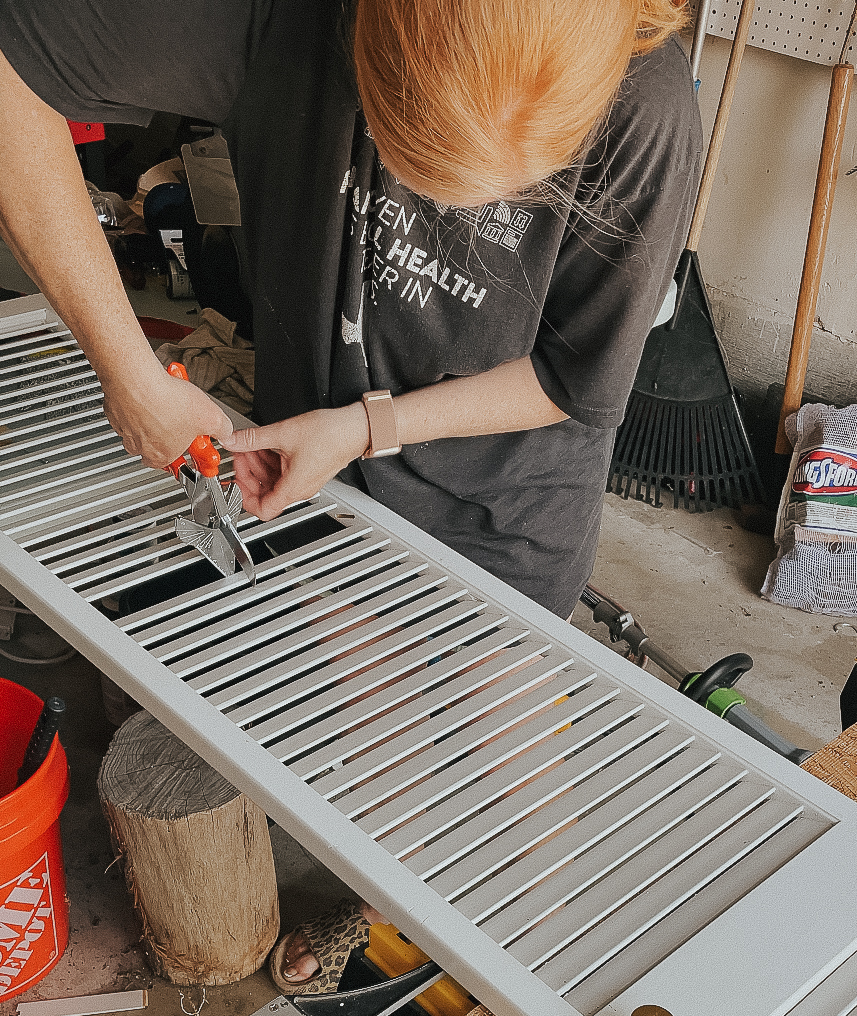
First things first, take your doors off the hinges and give them a good cleaning and wipe down. So much dust gets trapped in those shutters. Tip: Lay across two saw horses(or tables) in the garage to work with them lying flat with each end on one surface so you have the middle open to work with. After that, you are going to want to remove all the little shutter pieces. I used my miter shears to cut in the middle of a few of the shutters then I was able to just pull them out. I tried several methods and this one worked the best and the quickest. I have also seen others who have cut some out with a multi-tool then pull them out. I try to use as few electric tools as possible to make things easy. Remember: if you are putting a solid panel on bottom only cut out the shutters on the top. You will be covering the shutters on the bottom with your MDF (or if you use wood). This will save you time so you aren’t removing shutters that don’t need to be removed.

After they are all out you will want to fill the holes with wood filler. This is a bit tedious because the holes are deep. I had to do it really thick or one or two times once the first layer dried. I overfilled them and didn’t care if it was sloppy because I knew I was going to sand. It took me about 20 minutes to do this. Once the wood filler is dry, give it a good sand with a 150 grit then smooth it with a 220. Sand down until the surface is smooth/flush with the original surface. Since this will be on the inside of the door, you don’t have to make it look perfect if you don’t want to. I can honestly say I did not. It looked good but definitely not perfect. You can even skip it altogether if you do not care how it looks on the inside. 😉
Now is a good time to paint your doors. I stood mine up propping them against a wall and painted that way. I used Fusion Mineral paint in Park Bench green. This paint is so easy because a little goes a long way and usually you can get by with one coat if I apply it liberally and smoothly. I did 2 coats because I painted some areas too thin. While your doors are drying paint all your trim pieces. I think this made it easier so then all I had to paint once I attached the trim were a few touchups.

I measured the height and width of the opening where my plexi would go. Luckily, the plexi I ordered was exactly twice the width of what I needed so I just cut it in half. We started by using our handheld compact circular saw but it was proving too difficult to smoothly cut a straight line. So we ended up scoring it 4-5 times along a straight edge with a utility knife. Then we just snapped it in half.
Once that was done I took the plexi inside and applied the film to make it look reeded. This is an easy process but it does get wet because to apply the film you spray the plexi with water. This is how it sticks. The more water the better. It literally says that in the instructions. Smooth out the bubbles with a credit card(I cut out a piece of felt and taped to the edge of my card so it wouldn’t tear it) starting from the center and moving to the outside edge until all or most of the bubbles are out. Once it is applied I then took scissors and cut around the edges to size. The edges don’t need to be perfect because they will be covered with the trim once they are installed in the door. I let them dry overnight.

Next, I put my door back flat on my tables and used a router to cut the edges so the glass had something to “sit” in. I don’t think this was absolutely necessary. In order to make this power tool-less I think the glass glue and trim will hold it in place just fine. After that, I painted the area we routed out. I then applied the glass glue to the edges where we routed and where the glass would fit. It is the consistency of super glue so I applied it lightly so it wouldn’t ooze once I placed the glass in and show through.
IMPORTANT TIP: now lay your glass in with the film side facing in. The shiny side of your plexi will show on the outside of your doors when they are shut, not the film side. I made this mistake and had to re-do the whole thing!! This way it really hides any little bubbles or imperfections that might be in the film. I allowed it to dry for about 2 hours before attaching the trim.
Now I added the solid MDF panel on the bottom of the door. You can paint it first or after you attach it. I actually painted it after. Since mine was MDF and a bit dark, I did apply two coats of paint. I simple used wood glue over the entire panel and really well on the edges and sat it on top of the shutters. It fit perfectly. I used clamps on all 4 corners to hold it down while it dried for about 2 hours. If you do not have clamps use heavy objects.

Now to attach your trim. I placed the trim over the edges I was covering then marked the corner where I was cutting. This really didn’t take any math or skill, just eyeballs! I did not feel like using a nail gun and I did not want to risk a nail being shot into the plexi on the top panel so I opted for wood glue. If you don’t already know, wood glue is super strong. I feel confident in only using wood glue. I cut the corners to match up with 45º cuts on my miter shears. It is measured out on the shears so it makes it super simple to use. No power tools! Here is a snippet of how I did it in this video.
I also used the clamps to hold down the trim on all 4 corners to dry. I kept them on for about an hour. After all your trim is on it is time to attach the knobs! Depending on what kind of knobs you have, simply drill a hole or use the hole that the original knobs were in. I filled my hole because it was on the side and I wanted our knobs to be in the center of the door. This will solely depend on the kind of knobs you choose and the placement you choose. Now it is time to hang your doors! I think this transformation is a really colorful and fun edition to our breakfast nook. Here is a quick video on Instagram of the process.
Let me know if you have any questions in the comments! Always happy to help! And, as always…